The three words to make any seamstress cringe. I myself used to cringe at these words…but after a making a few of these handy dandy zipper bags I have conquered my fear!
This is a long tutorial beware!!
How many of you have a T-shirt in your closet that you haven’t worn in 6+ months because it is too short, tight, small, or has a stain on it?!?!? Well I have about a half a dozen of these taking up valuable space and hangers.
My solution: refashion them into useful items. Today’s Post is how to make a zipper bag (make up bag size) out of a T-shirt.
Supplies:
-One T-shirt you no longer wear
-A bit of coordinating fabric for the liner (1/4 yard with lots of leftovers)
-7” closed coil zipper
-Light weight fuse-able interfacing (1 yard, with left overs)
-Iron
-Sewing machine, matching thread, seam ripper, zipper foot, fabric scissors, straight pins
-Surger (completely optional)
-Ruler and pen/pencil/fabric marker
-Wax paper (to make your pattern)
How many of you ladies out there have make up bags that look like this???

stuffed full, zipper wont close, and that darn brush just doesn't fit!!
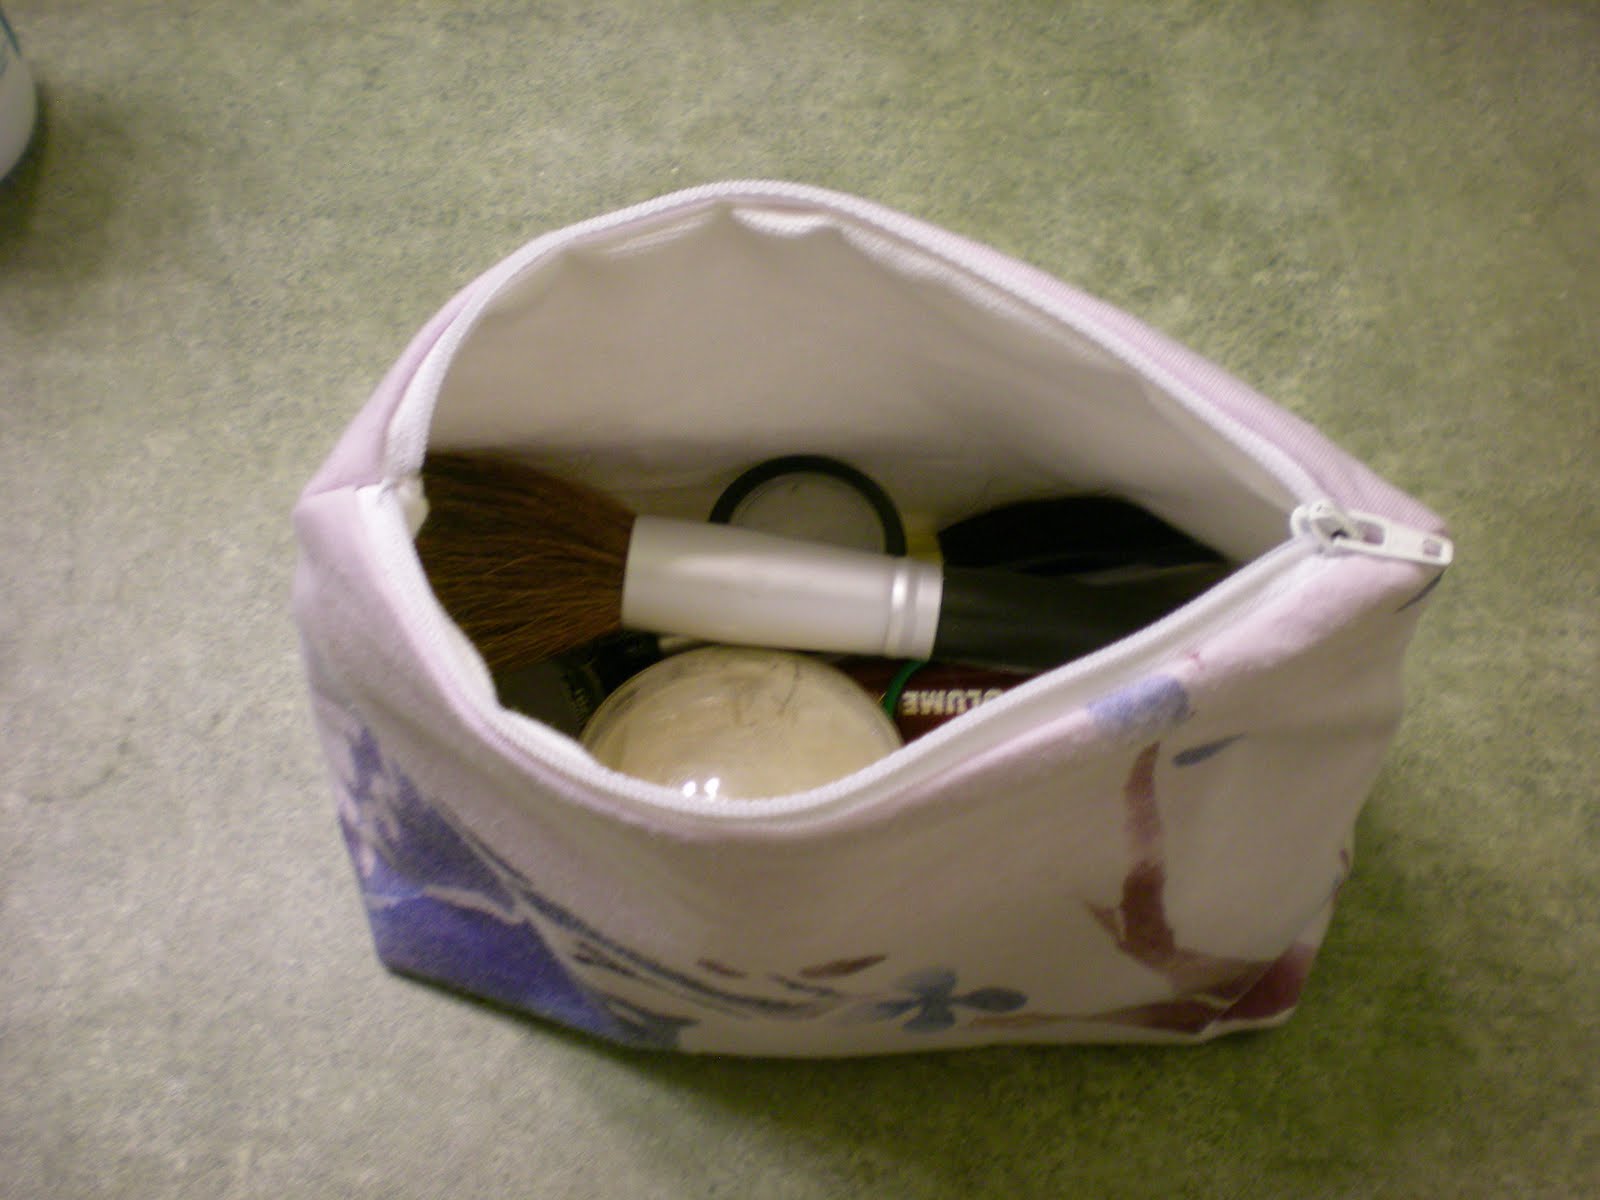
How about making an T-shirt into this:

ahh...much better!!
Okay here is how
First make your pattern:

My pattern is made our of wax paper--because you can see through it!! It is 8" at the top, 12" at the bottom and 8" tall.
Cut two pieces from your T-shirt, and two from a coordinating fabric (or out of your T-shirt if you have room)

Cut two pieces from your T-shirt, and two from a coordinating fabric (or out of your T-shirt if you have room)

Now since this is Jersey knit or T-shirt material it will stretch, its floppy, and it is very hard to sew a zipper with...thus here comes the interfacing part.
Interfacing
I used Pellon Light weigh Fuse-able interfacing. You can use any brand, it just happened to be the brand at my local fabric store.

Most interfacing comes with instructions like this....Read them and follow them closely

Before you go fusing your fabric, first test it out so you make sure you have the right iron temperature, interfacing, and fabric combination--its different between linen, jersey, canvas, etc. So beware!!


So for my T-shirt material and interfacing combo, using a medium-high heat setting on my iron worked best.
Common problems with interfacing and solutions:
"my fabric is wrinkled after I fused the interfacing, what to do?"
- lower you iron heat setting, Iron your fabric prior to fusing interfacing as well.
-If at first your fabric isn't wrinkled, but then after working with it a bit- you notice wrinkles then it is possible the interfacing is to stiff and heavy for the fabric you picked out.
"The interfacing isn't fusing to the fabric, what to do?"
-Make your iron a little hotter, use a little more pressure, and possibly use the 'steam' function. If that doesn't work, then hold the iron in one spot for about 10-15 seconds, then pick it up and move it to another spot.
"I'm so confused, NOTHING is working right?!?!"
READ the DIRECTIONS! Try out a test piece, and if it still doesn't work....I dunno, call customer service.
Okay now that you have tested out your interfacing fuse it to your T-shirt pieces.


Now you will notice your fabric is a tiny bit stiffer and it doesn't stretch!! COOL!
This is the prime time to add some fun details to your make up bag, grab some buttons, beads, ribbon, etc.

I was thinking about adding a few buttons.....but eh, couldn't find a color/shape/size/layout I liked so I skipped this step.
Next up (eek)
Zippers
Okay cringe just a little, take a deep breath, and realize that YOU CAN DO THIS!
Lets learn about zipper foots first....
On the left is your regular ole 1/4 inch foot, on the right is the zipper foot. This is important! When sewing in a zipper you must get close enough to the teeth, yet not too close, for this to work. Your zipper foot will allow this. So break out your machine manual and read up on how to install your zipper foot. Mine has a quick release lever in the back--but every machine is a little different.

Now lets talk zipper stitches

You can't use a "straight down the middle" straight stitch, you have to use one that is off to the side (like number 4 or 5).
Okay now that you have your zipper foot installed, and your proper stitch selected lets lay out fabric and pin it up.
Lay down the front piece of your make-up bag, face UP, then lay your zipper face DOWN like this:

Now put the liner piece on top, and pin

Now sew it up.

Okay notice that i'm starting with the zipper end (the side with out the pull thing) because it is easier to get going on this side--so I'm sewing the fabric with the interfaced side of the fabric up, and the liner down. (does that make sense?)
ALSO in order not to sew too close --if you do your zipper wont open, the fabric will get caught in the zipper pull---make sure you are about a 1/4 inch from the edge of your fabric. But at the same time you still want to get close enough so that you actually install the zipper and not miss it....so this is the tricky part. If you get this, you get zippers.
Okay once you sew the first side of the zipper it should look like this:

Now flip it over and repeat what we did earlier. Put the back side of your make up bag face up, put the zipper face down over it (the pull is now going to be on the right side)

Now lay your liner on top, line up the top edges, pin and sew.

YAY YOU DID IT!!! The hard part is over my friend, you can breath a sigh of relief, pat yourself on the back, do a little happy dance, and have a cookie :o)

lay out your now zippered fabric like this (faces together) and sew around the edges.

Leave a 4ish inch opening so you can turn it inside out. and reverse a few times over the zipper to make sure it is really not going anywhere (the red lines). After you sew it all around, trim your edges.

now turn your bag right side out, and sew the 4ish inch hole closed like this


(sorry it's kinda blurry! My camera is having a bad day)

fold the two raw edges in, and sew them together, be sure to lock your stitches by reversing at the beginning and end.
The final stage of this tutorial, you almost made it! Keep reading!!
Gussets
Now turn the inside out and the outside in...thus your bag is inside out.

Position you bag like so and grab your ruler and pen/pencil/fabric marker

Now make sure your seams are all lining up, especially the the T-shirt seams, and draw a three inch line across like this to make a triangle.

Straight stitch over the line

To make sure your fabric doesn't fray, this is a great opportunity to use your surger, or if you are a poor grad student like me, you use this handly little stitch, number 16 (my fav!)

Now trim the corner, and repeat.


Now flip it right side out, admire your handy work, do another happy dance, call up your crafty friend and tell her you just learned how to interface, sew a zipper, and gusset a corner!!! The best part is, now all your make-up and/or toiletry essentials will fit nicely!

Look at that sexy gusset corner!

Phoebe likes it too!!

Be prepared! These are VERY ADDICTING!!!
Interesting facts:
My white pin holder pictured in some of these pictures is actually magnetic, you can find a cheap one online here, it is FANTASTIC!!
Also get zippers cheap here!! Don't pay $1.50 for a zipper when you can pay thirty cents!!
I hope you enjoyed this post! If you have any questions or concerns just leave a comment, and I'll answer you shortly!
Thanks for stopping by!
This is such a great tutorial! Thanks for linking up to Sister Sister Sunday!
ReplyDeleteValioso tutorial, muchas gracias por el esfuerzo y la dedicación. Está genial!
ReplyDeleteAbrazos desde Colombia!